Page 1 of 3 123 LastLast
Results 1 to 40 of 98

Thread: Building my new Frankenstrat

  1. #1
    Puts the ass in Class
    Veteran
    indeedido's Avatar
    Member No
    1022
    Join Date
    Feb 2004
    Last Online
    09-23-2017 @ 12:50 PM
    Location
    Where the wind comes sweeping down the plains
    Posts
    2,293
    Status
    Offline
    Thanks
    473
    Thanked 284 Times in 215 Posts


    Rep Power
    26

    Building my new Frankenstrat

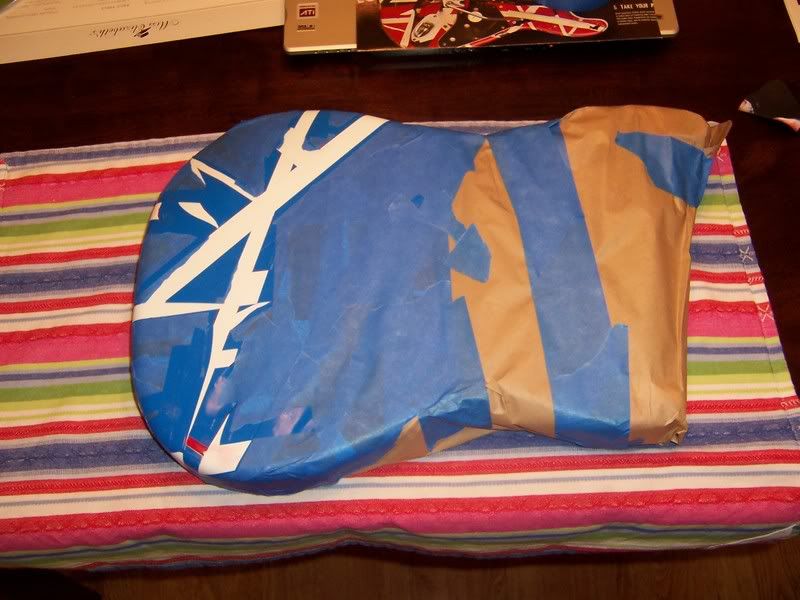
    I know this has been done before several times over. But I thought I would share my process with everyone. I do it a little different, so maybe someone could learn something new from my process any way, I'll start.

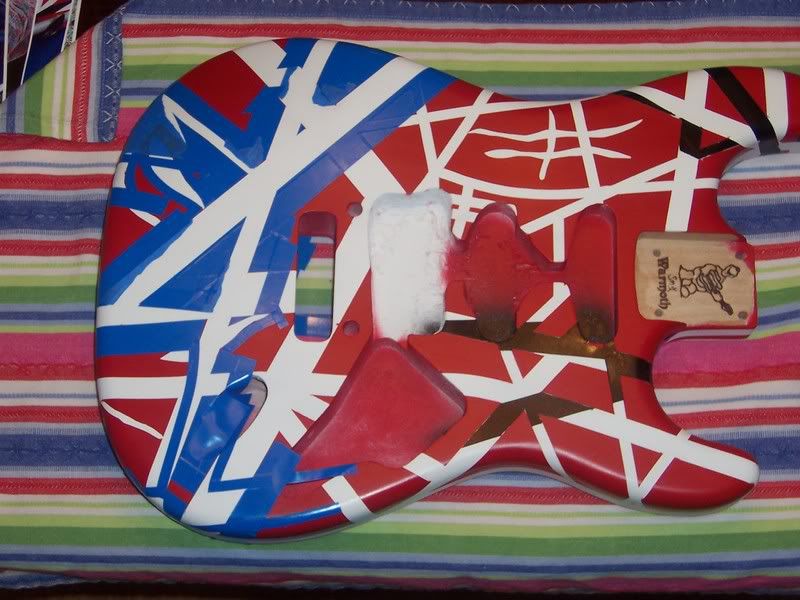
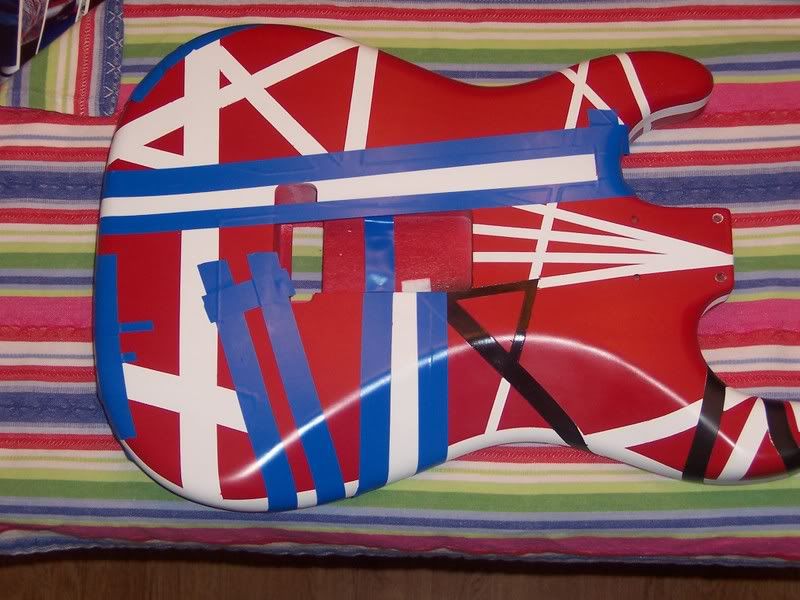
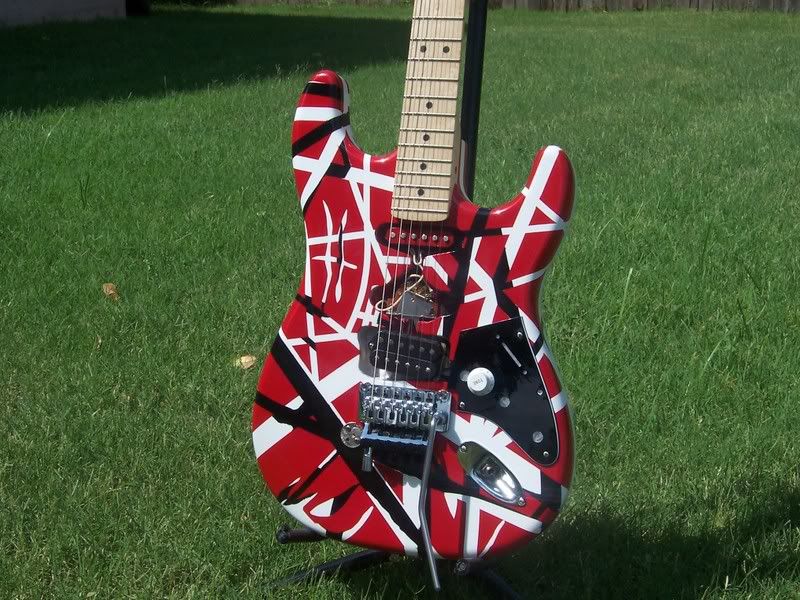
    I've collected all of my parts. All new stuff. I have made some of this my own, meaning I didn't necessarily try to mimic Ed's original in every detail, but I did most.

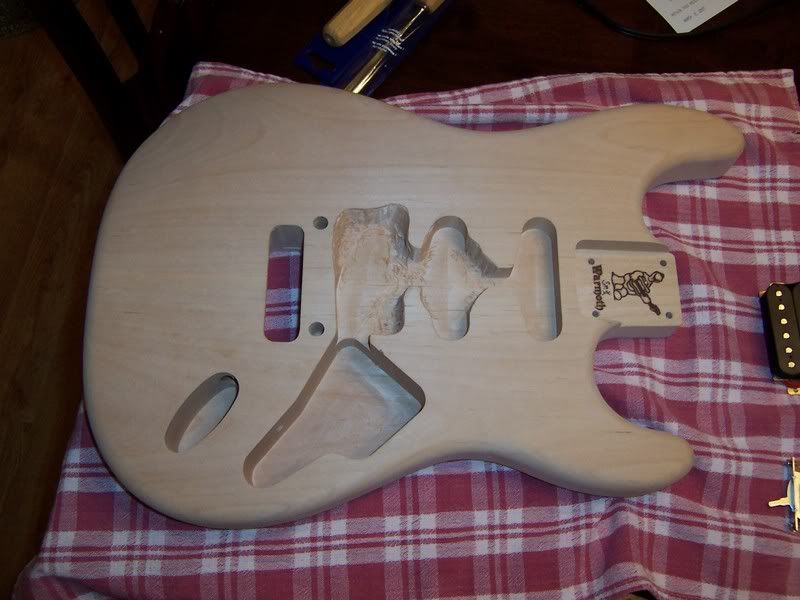
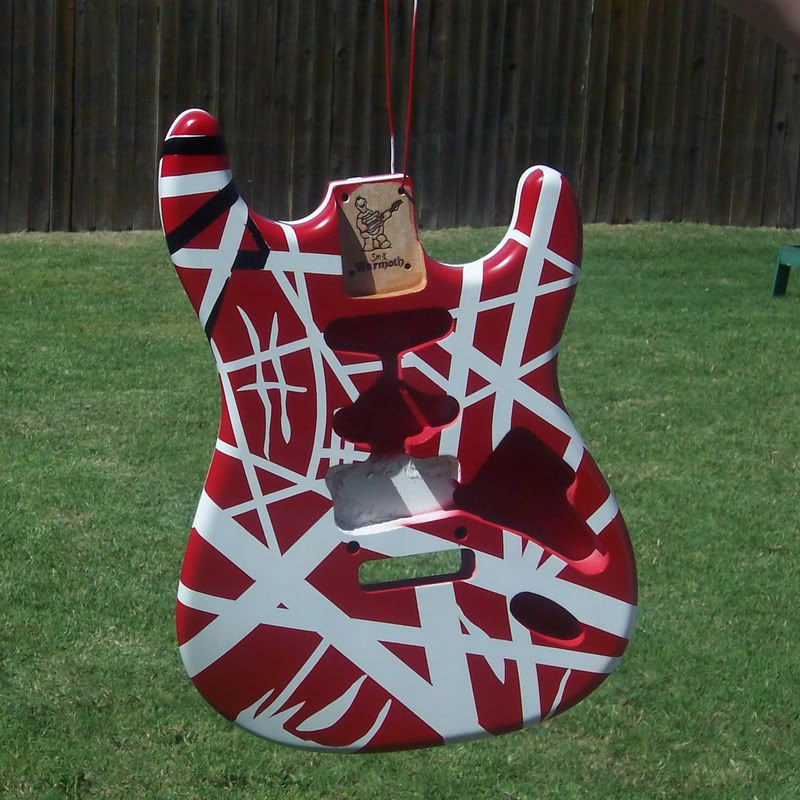
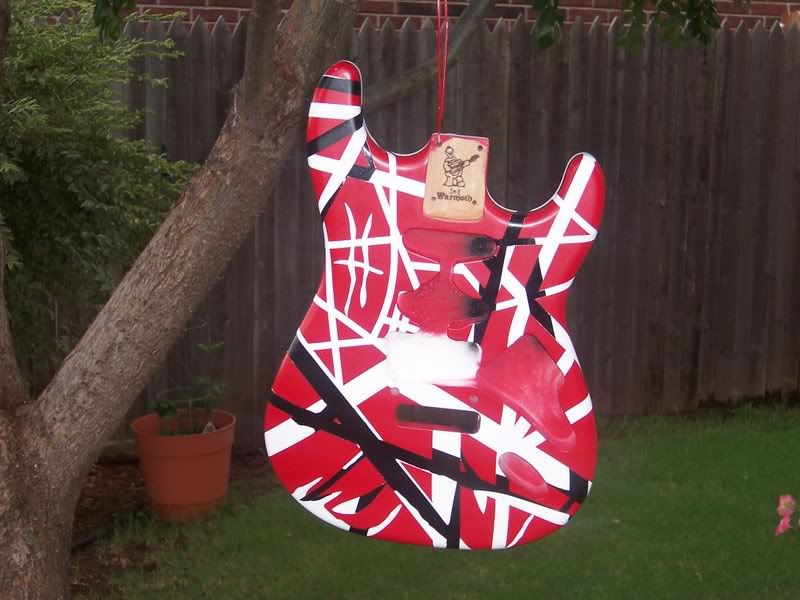
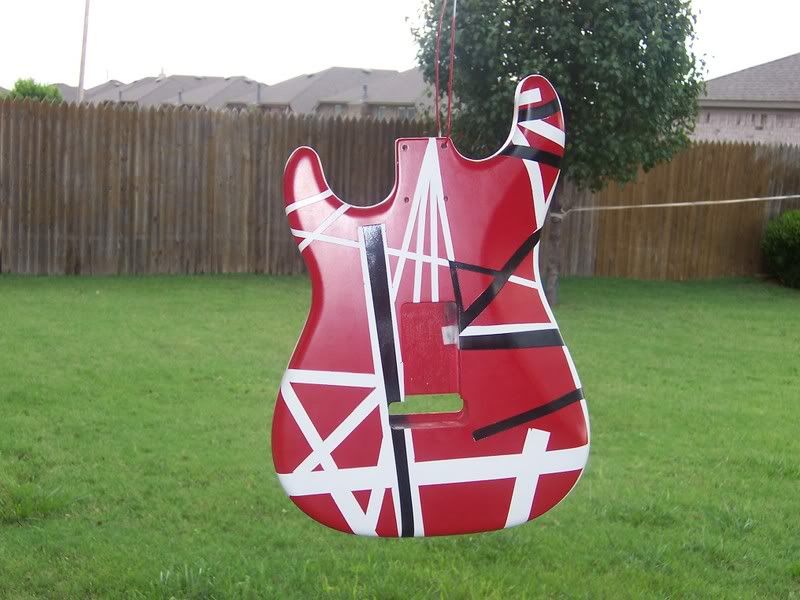
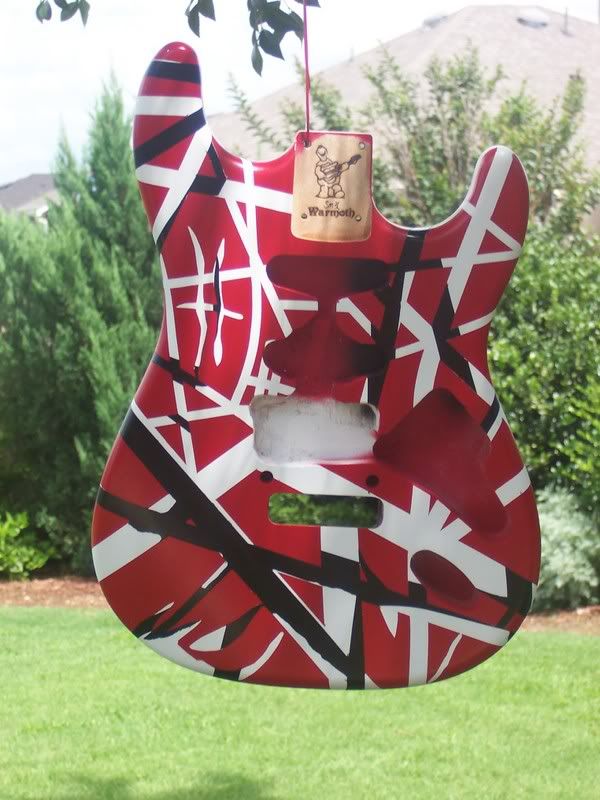
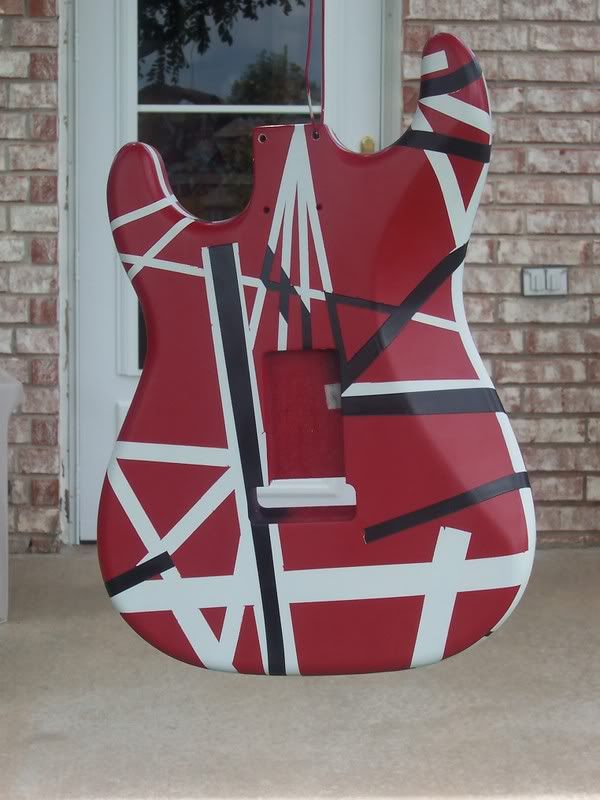
    For example, I got the body and neck from Warmoth. Body is made from Alder instead of Ash/Swamp Ash. I like Alder better. The neck is Birdseye maple. Awesome figure.

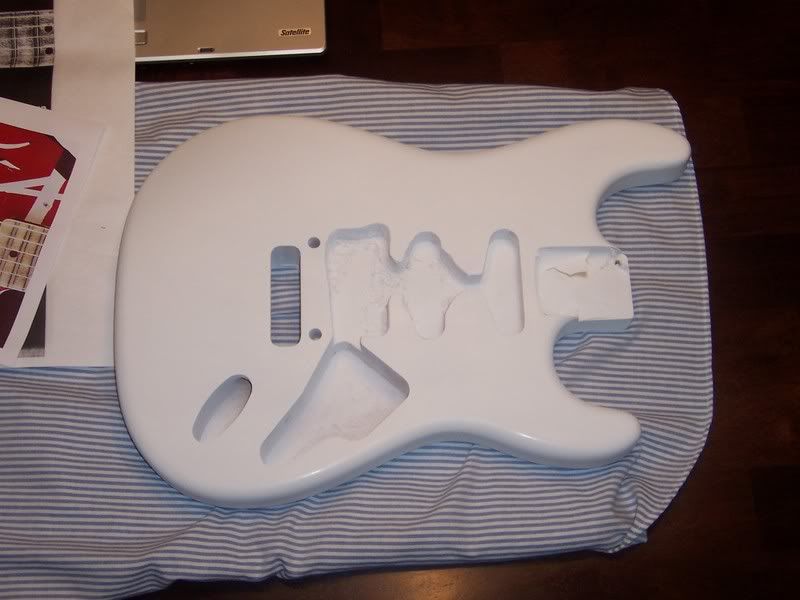
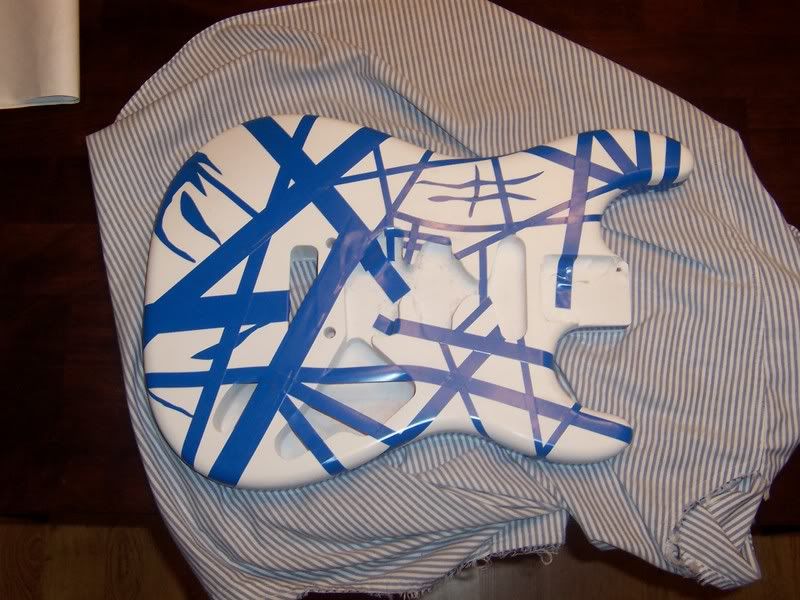
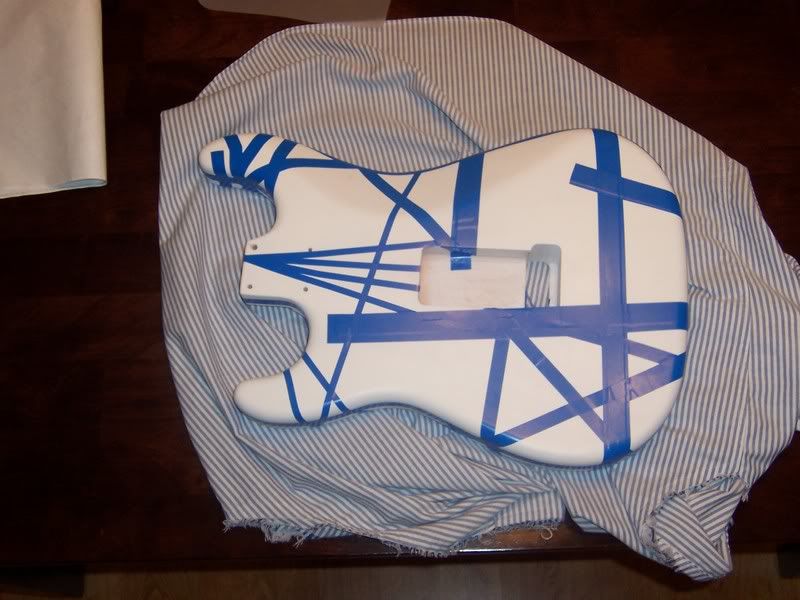
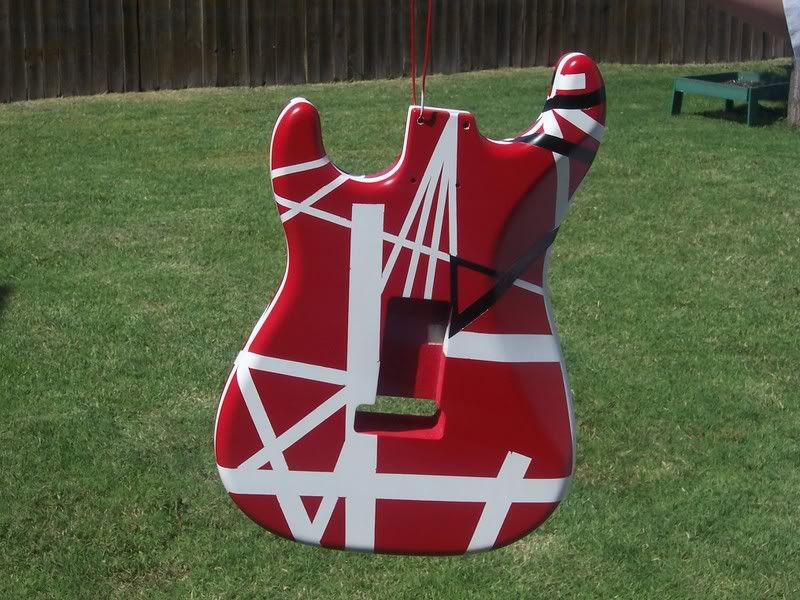
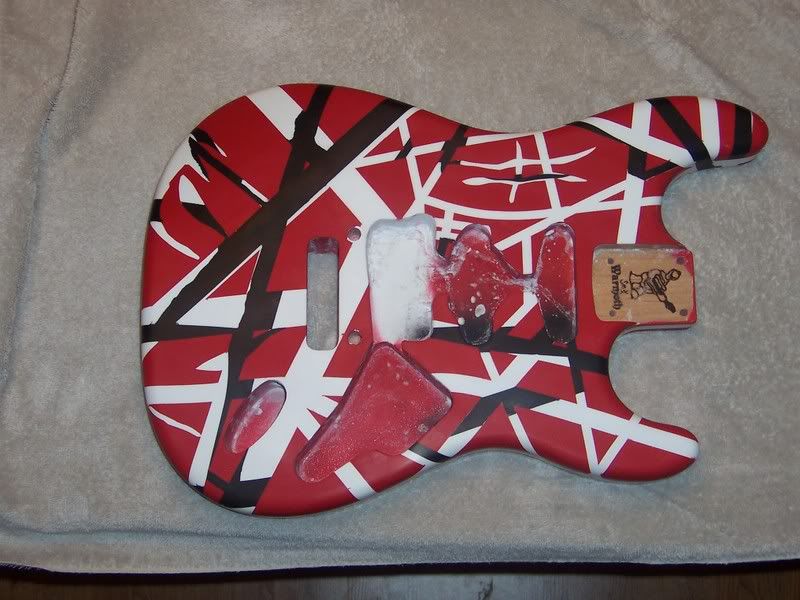
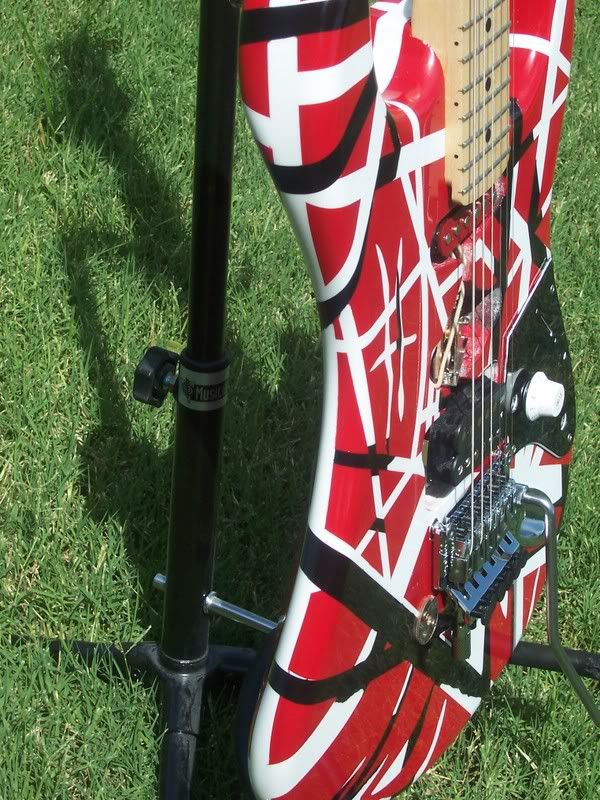
    I wanted mine to look like what it would had known how to paint. I wanted the same design, only to look more factory finished.
    Hey Jackass! You need to [Register] or log in to view signatures on ROTHARMY.COM!

  2. #2
    Puts the ass in Class
    Veteran
    indeedido's Avatar
    Member No
    1022
    Join Date
    Feb 2004
    Last Online
    09-23-2017 @ 12:50 PM
    Location
    Where the wind comes sweeping down the plains
    Posts
    2,293
    Status
    Offline
    Thanks
    473
    Thanked 284 Times in 215 Posts


    Rep Power
    26
    Modified pickguard [IMG][/IMG]
    Last edited by indeedido; 05-28-2007 at 10:23 AM.

  3. #3
    Roadie

    Member No
    22304
    Join Date
    Dec 2006
    Last Online
    01-21-2009 @ 05:10 PM
    Location
    new york
    Posts
    175
    Status
    Offline
    Thanks
    0
    Thanked 0 Times in 0 Posts


    Rep Power
    18
    I'd be very interested in seeing a picture once you're done building it. I've been thinking of doing the same thing for awhile now.
    Hey Jackass! You need to [Register] or log in to view signatures on ROTHARMY.COM!

  4. #4
    Puts the ass in Class
    Veteran
    indeedido's Avatar
    Member No
    1022
    Join Date
    Feb 2004
    Last Online
    09-23-2017 @ 12:50 PM
    Location
    Where the wind comes sweeping down the plains
    Posts
    2,293
    Status
    Offline
    Thanks
    473
    Thanked 284 Times in 215 Posts


    Rep Power
    26
    Hmmm, my images aren't uploading correctly. Let me see again,
    Last edited by indeedido; 05-28-2007 at 10:29 AM.

  5. #5
    Puts the ass in Class
    Veteran
    indeedido's Avatar
    Member No
    1022
    Join Date
    Feb 2004
    Last Online
    09-23-2017 @ 12:50 PM
    Location
    Where the wind comes sweeping down the plains
    Posts
    2,293
    Status
    Offline
    Thanks
    473
    Thanked 284 Times in 215 Posts


    Rep Power
    26
    Photo Sharing and Video Hosting at Photobucket

  6. #6
    Puts the ass in Class
    Veteran
    indeedido's Avatar
    Member No
    1022
    Join Date
    Feb 2004
    Last Online
    09-23-2017 @ 12:50 PM
    Location
    Where the wind comes sweeping down the plains
    Posts
    2,293
    Status
    Offline
    Thanks
    473
    Thanked 284 Times in 215 Posts


    Rep Power
    26
    I'm using the IMG coding, not sure what the issue is. Anyone? I've uploaded them to photobucket

  7. #7
    Puts the ass in Class
    Veteran
    indeedido's Avatar
    Member No
    1022
    Join Date
    Feb 2004
    Last Online
    09-23-2017 @ 12:50 PM
    Location
    Where the wind comes sweeping down the plains
    Posts
    2,293
    Status
    Offline
    Thanks
    473
    Thanked 284 Times in 215 Posts


    Rep Power
    26
    .

  8. #8
    Roadie

    Member No
    22304
    Join Date
    Dec 2006
    Last Online
    01-21-2009 @ 05:10 PM
    Location
    new york
    Posts
    175
    Status
    Offline
    Thanks
    0
    Thanked 0 Times in 0 Posts


    Rep Power
    18
    I have a newer Squier body that someone gave me and I'm thinking of using that. Whats your opinion? Should I use the Squier or dig up an original Strat body. I'm pretty particular with this shit. Although they look exactly the same I know the cheaper Squiers don't have the sound quality. I'm looking for function as well as looks. The biggest problem is going to be getting the 71 quarter. LOL

  9. #9
    Puts the ass in Class
    Veteran
    indeedido's Avatar
    Member No
    1022
    Join Date
    Feb 2004
    Last Online
    09-23-2017 @ 12:50 PM
    Location
    Where the wind comes sweeping down the plains
    Posts
    2,293
    Status
    Offline
    Thanks
    473
    Thanked 284 Times in 215 Posts


    Rep Power
    26
    I don't know what kind of wood the squier is made of. You could easily use it and nobody would know where it came from. Could be basswood which is a pretty decent wood.

  10. #10
    Puts the ass in Class
    Veteran
    indeedido's Avatar
    Member No
    1022
    Join Date
    Feb 2004
    Last Online
    09-23-2017 @ 12:50 PM
    Location
    Where the wind comes sweeping down the plains
    Posts
    2,293
    Status
    Offline
    Thanks
    473
    Thanked 284 Times in 215 Posts


    Rep Power
    26
    So here is my body. A Warmoth Strat Alder wood body. Routed for three single coil pickups, I wanted to chisel out the humbucker just like Ed did. I applied some sand sealer to the body and got it ready with some 400 grit sand paper.


  11. #11
    Puts the ass in Class
    Veteran
    indeedido's Avatar
    Member No
    1022
    Join Date
    Feb 2004
    Last Online
    09-23-2017 @ 12:50 PM
    Location
    Where the wind comes sweeping down the plains
    Posts
    2,293
    Status
    Offline
    Thanks
    473
    Thanked 284 Times in 215 Posts


    Rep Power
    26
    Then I made my pattern for the route I needed to chisel out. I bought a brochure of the $25,000 Frankenstrat Fender is selling from ebay. I scanned it in and blew it up to full size and traced the pattern onto the body with carbon paper.


  12. #12
    Roadie

    Member No
    22304
    Join Date
    Dec 2006
    Last Online
    01-21-2009 @ 05:10 PM
    Location
    new york
    Posts
    175
    Status
    Offline
    Thanks
    0
    Thanked 0 Times in 0 Posts


    Rep Power
    18
    Great pictures. I'd love to see more as you progress with the guitar. You made up my mind. I think I'll go your route and get the body through Warmoth. I actually use the Squier to display a original signed pick gaurd by McCartney, Harrison and Starr so I guess I'll leave it that way. Thanks again for your input.

  13. #13
    Cunning Linguist
    DIAMOND STATUS
    jhale667's Avatar
    Member No
    7379
    Join Date
    Aug 2004
    Last Online
    04-07-2016 @ 01:20 AM
    Location
    Los Angeles
    Posts
    20,929
    Status
    Offline
    Thanks
    8,152
    Thanked 4,110 Times in 2,874 Posts


    Rep Power
    82
    Originally posted by indeedido
    I don't know what kind of wood the squier is made of. You could easily use it and nobody would know where it came from. Could be basswood which is a pretty decent wood.
    DO NOT use a squier. It's probably Agathis, which is even shittier wood than (B)asswood.

    Nice work so far with the Warmoth, though! 
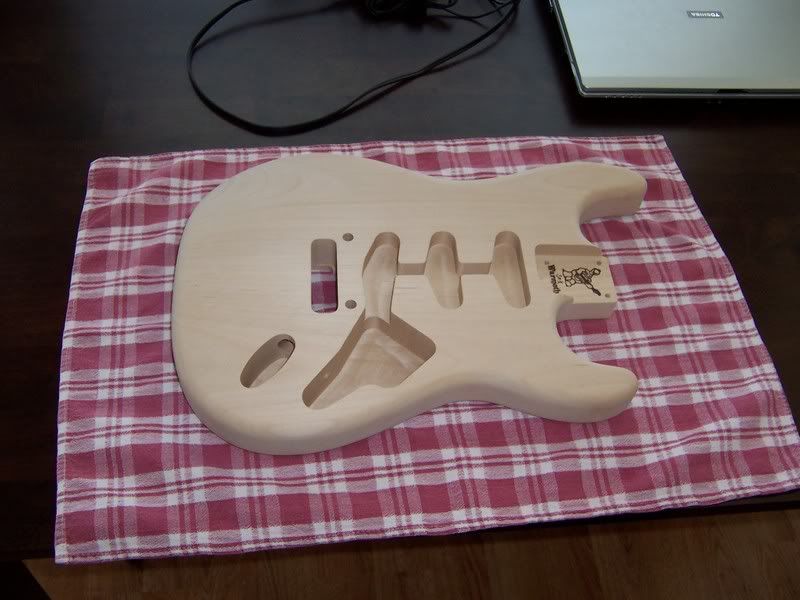
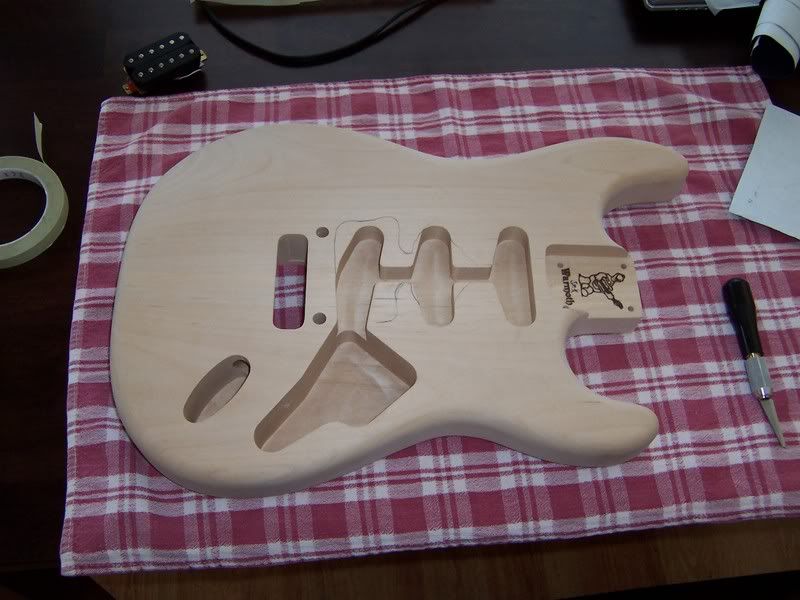
I would have stuck with Ash, though...not a fan of Alder either....
    Hey Jackass! You need to [Register] or log in to view signatures on ROTHARMY.COM!

  14. #14
    Puts the ass in Class
    Veteran
    indeedido's Avatar
    Member No
    1022
    Join Date
    Feb 2004
    Last Online
    09-23-2017 @ 12:50 PM
    Location
    Where the wind comes sweeping down the plains
    Posts
    2,293
    Status
    Offline
    Thanks
    473
    Thanked 284 Times in 215 Posts


    Rep Power
    26
    Next up, the body after some chiseling has been done. Yet to be cleaned up with some sanding drums. The chiseling feels like the most important aspect of the project as it will dictate where the stripes go.


  15. #15
    Puts the ass in Class
    Veteran
    indeedido's Avatar
    Member No
    1022
    Join Date
    Feb 2004
    Last Online
    09-23-2017 @ 12:50 PM
    Location
    Where the wind comes sweeping down the plains
    Posts
    2,293
    Status
    Offline
    Thanks
    473
    Thanked 284 Times in 215 Posts


    Rep Power
    26
    I meant to list some of these parts earlier, but forgot when I couldn't get them to post correctly. I don't know whey they aren't showing up. Never had a problem before.

    Here is my 1971 quarter. I bought a new uncirculated quarter when I couldn't find one. I feel I got all the holes and the "dent" in the side in the correct places.


    Here's my pickguard. Has a 500k volume pot in it now, but am thinking about trying out a 1 megaohm pot to really run things wide open.


    And as far as parts go, the only thing else I should mention is my neckplate. I found a guy online that does custom engraving. So I got an EVH neckplate made. Notice the serial number, 001. Yes, I have the first made! lol


  16. #16
    Puts the ass in Class
    Veteran
    indeedido's Avatar
    Member No
    1022
    Join Date
    Feb 2004
    Last Online
    09-23-2017 @ 12:50 PM
    Location
    Where the wind comes sweeping down the plains
    Posts
    2,293
    Status
    Offline
    Thanks
    473
    Thanked 284 Times in 215 Posts


    Rep Power
    26
    Now back to the body. I used Deft sanding sealer as I mentioned earlier to seal the grain. Now I've used a white primer I got from guitar reranch. The cool thing about this primer is, it won't yellow. If I used a white nitrocellulose laquer it would yellow over time once hit with the clear coat. So I'm going to leave the base of this as white primer. Here is where I go a little different than most. Or a lot different. I'm going to shoot red next and then black last.

  17. #17
    Puts the ass in Class
    Veteran
    indeedido's Avatar
    Member No
    1022
    Join Date
    Feb 2004
    Last Online
    09-23-2017 @ 12:50 PM
    Location
    Where the wind comes sweeping down the plains
    Posts
    2,293
    Status
    Offline
    Thanks
    473
    Thanked 284 Times in 215 Posts


    Rep Power
    26
    The tape I used was 3M automotive pin striping tape. Gives you lots of flexibility to go around corners and such. Once you get it down, no bleed either. Since I'm not doing a relic, I do not want any bleed.

    I used three sizes. 3/4 inch, 1/2 inch and 1/4 inch. I made all of the sizes from uses these three in conjunction by overlapping tthem needed. I drew the squiggly lines on the 3/4 for example too and cut them out. Worked great.

    Front


    Back

  18. #18
    Puts the ass in Class
    Veteran
    indeedido's Avatar
    Member No
    1022
    Join Date
    Feb 2004
    Last Online
    09-23-2017 @ 12:50 PM
    Location
    Where the wind comes sweeping down the plains
    Posts
    2,293
    Status
    Offline
    Thanks
    473
    Thanked 284 Times in 215 Posts


    Rep Power
    26
    For the red paint, I used automotive laquer paint that is loaded into rattle cans. No krylon here folks. This stuff is the think to use if you don't have a sprayer. You just get the paint code from whatever make and model car and they mix it. You can find them at automotivetouchup.com, I got the clear coat from them as well. Great stuff. Any way the color of red I chose is from an IROC-Z28 I had years ago. I liked the shade of red so that is what I decided to use. It's also a common Chevy red.

  19. #19
    Puts the ass in Class
    Veteran
    indeedido's Avatar
    Member No
    1022
    Join Date
    Feb 2004
    Last Online
    09-23-2017 @ 12:50 PM
    Location
    Where the wind comes sweeping down the plains
    Posts
    2,293
    Status
    Offline
    Thanks
    473
    Thanked 284 Times in 215 Posts


    Rep Power
    26
    Body shot red


    and after tape peeled off


    Once I hit it with the black stripes, this thing is gonna POP. Doesn't quite look done without the black does it?

  20. #20
    Puts the ass in Class
    Veteran
    indeedido's Avatar
    Member No
    1022
    Join Date
    Feb 2004
    Last Online
    09-23-2017 @ 12:50 PM
    Location
    Where the wind comes sweeping down the plains
    Posts
    2,293
    Status
    Offline
    Thanks
    473
    Thanked 284 Times in 215 Posts


    Rep Power
    26
    This is where the body is left off. I'll let it sit for a few days to cure up a bit before I mask off for the black......

    On to the neck. Originally I was going to do it without a decal, like what Ed's originally looked like. Then after I found the neckplate, I decided to do a EVH series Charvel. That is why there is no skunk stripe on the back. Ed's original didn't have one, but the charvel does. What can you do. Worked out better for me because Warmoth doesn't have an option to do custom back profiles with skunk stripes. So I have a birdseye maple neck, highly figured, with the Wizard back contour. I love the way it feels.

    I photoshoped myself a few logos. Basically traced them so I could get some hi res files. You'll see Charvel and EVH Art Series on the front. And on the back you'll find a Custom Shop logo and Ed's signature. I felt these looked pretty cool and haven't seen anyone use these on theirs yet.

    Also I have done some oiled necks in the past and love them. But I wanted to experiment here a little bit. At guitar reranch, they had a satin laquer that they claimed felt like raw wood. I'll be damned if they weren't right. This stuff is the shit!! I put on about 6 coats on the neck and around 10 or 11 on the headstock to seal in the decals. Then I sanded it down starting at 600 grit paper working up to 1500 grit. 600, 800, 1000, 1200, 1500. You cannot tell this has a finish on it at all. Feels so natural and it is protected. Also, you cannot find any traces of the edge of any of my decals. I'm so pleased with it. Oh yeah, got the water slide decal paper at a online model shop called micro mark

    Front:


    Back:

  21. #21
    Cunning Linguist
    DIAMOND STATUS
    jhale667's Avatar
    Member No
    7379
    Join Date
    Aug 2004
    Last Online
    04-07-2016 @ 01:20 AM
    Location
    Los Angeles
    Posts
    20,929
    Status
    Offline
    Thanks
    8,152
    Thanked 4,110 Times in 2,874 Posts


    Rep Power
    82
    Originally posted by indeedido
    Body shot red


    and after tape peeled off


    Once I hit it with the black stripes, this thing is gonna POP. Doesn't quite look done without the black does it?

    Just curious...why didn't you do the black layer/stripe base before the white, ala the real Frankenstrat?

  22. #22
    Puts the ass in Class
    Veteran
    indeedido's Avatar
    Member No
    1022
    Join Date
    Feb 2004
    Last Online
    09-23-2017 @ 12:50 PM
    Location
    Where the wind comes sweeping down the plains
    Posts
    2,293
    Status
    Offline
    Thanks
    473
    Thanked 284 Times in 215 Posts


    Rep Power
    26
    Just personal preference. I didn't want any of the black "ghost" stripes to show under the red. This way I can control where the black goes. I thought about it for a while and I know the original has them, but I think had Edward known what he was doing instead of just randomizing what he did, it might have come out this way. It just looks nicer to me. Plus it's more of a challenge to do a cleaner version than a relic because you need to control the paint environment more. Just personal taste. I saw one recently over at one of the other sites that was done this way too. Looked pretty good.

  23. #23
    Commando

    Member No
    14636
    Join Date
    Jun 2005
    Last Online
    06-11-2007 @ 07:37 PM
    Location
    USA
    Posts
    1,041
    Status
    Offline
    Thanks
    0
    Thanked 0 Times in 0 Posts


    Rep Power
    20
    Nice job man..I am enjoying your progress and updates..

    I am spending some time with my strat today..

    Cheers,

    KiD
    Hey Jackass! You need to [Register] or log in to view signatures on ROTHARMY.COM!

  24. #24
    The Don: Roth Army Militi
    Veteran
    Don Corleone's Avatar
    Member No
    4651
    Join Date
    May 2004
    Last Online
    02-17-2024 @ 10:50 AM
    Location
    Various
    Age
    47
    Posts
    2,076
    Status
    Offline
    Thanks
    25
    Thanked 86 Times in 41 Posts


    Rep Power
    22
    Originally posted by indeedido
    but I think had Edward known what he was doing instead of just randomizing what he did, it might have come out this way.
    You maybe right there. You just have to look at later versions that Ed painted, specifically the 5150 - White, Red then Black.
    Hey Jackass! You need to [Register] or log in to view signatures on ROTHARMY.COM!

  25. #25
    Puts the ass in Class
    Veteran
    indeedido's Avatar
    Member No
    1022
    Join Date
    Feb 2004
    Last Online
    09-23-2017 @ 12:50 PM
    Location
    Where the wind comes sweeping down the plains
    Posts
    2,293
    Status
    Offline
    Thanks
    473
    Thanked 284 Times in 215 Posts


    Rep Power
    26
    Well, here is a minor update. We've been getting so much rain, it's hard to build up much steam. I've added a little bit of black stripes. Also finished up the neck and added some hardware. Schaller M-6 tuners and I'm using an original floyd rose, attached is the R-2 nut and string retainer. The only thing I haven't put on the back of the headstock yet is the allen wrench holder for the floyd.


    Front with some black:


    Back with some black:


    Front of headstock w/ hardware


    back of headstock w/ hardware

  26. #26
    Puts the ass in Class
    Veteran
    indeedido's Avatar
    Member No
    1022
    Join Date
    Feb 2004
    Last Online
    09-23-2017 @ 12:50 PM
    Location
    Where the wind comes sweeping down the plains
    Posts
    2,293
    Status
    Offline
    Thanks
    473
    Thanked 284 Times in 215 Posts


    Rep Power
    26
    P.S. I just couldn't put the string retainer on crooked like Ed. It would bother me to look at it 'til my grave. It would make me think I fucked it up every time I looked at it.

  27. #27
    Cunning Linguist
    DIAMOND STATUS
    jhale667's Avatar
    Member No
    7379
    Join Date
    Aug 2004
    Last Online
    04-07-2016 @ 01:20 AM
    Location
    Los Angeles
    Posts
    20,929
    Status
    Offline
    Thanks
    8,152
    Thanked 4,110 Times in 2,874 Posts


    Rep Power
    82
    Originally posted by indeedido
    P.S. I just couldn't put the string retainer on crooked like Ed. It would bother me to look at it 'til my grave. It would make me think I fucked it up every time I looked at it.
    Agreed.

  28. #28
    Puts the ass in Class
    Veteran
    indeedido's Avatar
    Member No
    1022
    Join Date
    Feb 2004
    Last Online
    09-23-2017 @ 12:50 PM
    Location
    Where the wind comes sweeping down the plains
    Posts
    2,293
    Status
    Offline
    Thanks
    473
    Thanked 284 Times in 215 Posts


    Rep Power
    26
    It's been uncharacteristically rainy this year, but I've made some more progress finally. Dig it........

    I got the front taped for some more black. Again, moving slowly and methodically.


    Got the back taped up too


    Now the whole thing ready to shoot....

  29. #29
    Puts the ass in Class
    Veteran
    indeedido's Avatar
    Member No
    1022
    Join Date
    Feb 2004
    Last Online
    09-23-2017 @ 12:50 PM
    Location
    Where the wind comes sweeping down the plains
    Posts
    2,293
    Status
    Offline
    Thanks
    473
    Thanked 284 Times in 215 Posts


    Rep Power
    26
    And now to pull off the tape and paper. Voila, instant controlled madness.

    Front:


    Back:

  30. #30
    Puts the ass in Class
    Veteran
    indeedido's Avatar
    Member No
    1022
    Join Date
    Feb 2004
    Last Online
    09-23-2017 @ 12:50 PM
    Location
    Where the wind comes sweeping down the plains
    Posts
    2,293
    Status
    Offline
    Thanks
    473
    Thanked 284 Times in 215 Posts


    Rep Power
    26
    I've got just a few more areas to add black to. Hope to be done with the black in a few days, but the storms are rolling back in so we'll see. Once that is complete, I will clear coat it and let it cure up before final polish. Now it is starting to shape up! I can't wait to get it done and play it.

  31. #31
    Puts the ass in Class
    Veteran
    indeedido's Avatar
    Member No
    1022
    Join Date
    Feb 2004
    Last Online
    09-23-2017 @ 12:50 PM
    Location
    Where the wind comes sweeping down the plains
    Posts
    2,293
    Status
    Offline
    Thanks
    473
    Thanked 284 Times in 215 Posts


    Rep Power
    26
    OK, all the black has now been applied. I think I'm getting close. Next step is the clear coat. Hope to be able to get it started tonight. Fingers crossed


    finished front:


    back: I didn't care as much about the back, so I didn't try as hard to make it 100% correct.


  32. #32
    Puts the ass in Class
    Veteran
    indeedido's Avatar
    Member No
    1022
    Join Date
    Feb 2004
    Last Online
    09-23-2017 @ 12:50 PM
    Location
    Where the wind comes sweeping down the plains
    Posts
    2,293
    Status
    Offline
    Thanks
    473
    Thanked 284 Times in 215 Posts


    Rep Power
    26
    UPDATE:

    Well, we've had 21 straight days of rain in OKC. Not condusive for my project. I have been able to get several layers of clear coat in early in the morning while the humidity is low. The last one, I thought the humidity was low, it wasn't. It gave that layer a nice look of blush. Basically the moisture got in and "fogged" it up. No worry though, I got enough coats on that all I need to do is sand it out with 400, 600 and 800 grit. It the stripes get smooth enough meaning no hard lines felt, I'll finish it out, otherwise I'll add a few more clear coats in a few days, rain permitting of course.

  33. #33
    Live from the Mojo Dojo
    Head Fluffer
    cdwillis's Avatar
    Member No
    11045
    Join Date
    Feb 2005
    Last Online
    10-27-2019 @ 06:29 PM
    Location
    Indiana, USA
    Age
    39
    Posts
    251
    Status
    Offline
    Thanks
    0
    Thanked 0 Times in 0 Posts


    Rep Power
    20
    It looks pretty good without the clear coat. It seems to me like it would have been easier to spray the black before the red but you really aced it.

    I'm curious about the paint you've used. I've seen pictures of Krylon that crackles eventually and makes the guitar look like shit. I've almost decided to use a natural truoil finish on my guitar I'm building but after seeing this I'm tempted to paint again. How long does this automotive lacquer take to cure?
    Hey Jackass! You need to [Register] or log in to view signatures on ROTHARMY.COM!

  34. #34
    Puts the ass in Class
    Veteran
    indeedido's Avatar
    Member No
    1022
    Join Date
    Feb 2004
    Last Online
    09-23-2017 @ 12:50 PM
    Location
    Where the wind comes sweeping down the plains
    Posts
    2,293
    Status
    Offline
    Thanks
    473
    Thanked 284 Times in 215 Posts


    Rep Power
    26
    It takes about 3-4 days to harden enough to begin wet sanding. Like any lacquer, it takes time to completely harden. After I do the final polish, I'll let it sit for about 30 days to harden and cure up.

    The lacquer is still relatively soft and can scratch. The lacquer will continue to harden for literally years but should reach its practical hardness in 30 to 60 days.

  35. #35
    Puts the ass in Class
    Veteran
    indeedido's Avatar
    Member No
    1022
    Join Date
    Feb 2004
    Last Online
    09-23-2017 @ 12:50 PM
    Location
    Where the wind comes sweeping down the plains
    Posts
    2,293
    Status
    Offline
    Thanks
    473
    Thanked 284 Times in 215 Posts


    Rep Power
    26
    P.S. the paint I used is the shiznit. I've done others several years ago and still look fantastic. I would never use Krylon. It isn't much good for anything you want to keep. Even lawn furniture.

  36. #36
    Puts the ass in Class
    Veteran
    indeedido's Avatar
    Member No
    1022
    Join Date
    Feb 2004
    Last Online
    09-23-2017 @ 12:50 PM
    Location
    Where the wind comes sweeping down the plains
    Posts
    2,293
    Status
    Offline
    Thanks
    473
    Thanked 284 Times in 215 Posts


    Rep Power
    26
    Almost done and rounding the last corner.

    I let the body sit for about a week before I was able to begin the wet sanding. I really need some good old sunshine. You can't be natural light for this kind of work. Without it, you will miss most of what you are doing.

    The purpose of wet sanding after shooting the clear is:
    1. to level it. you will take out all of the orange peel that the clear coat has left.

    2. to smooth out the feel of the lines. Once you do this step, you will feel ZERO lines.


    After allowing the body to dry at least three days (with nitrocellulose lacquer, the longer the better and the weather made me wait longer) final sanding and polishing can be done. The sanding will be done with successively finer grades of paper. The grades required are #400, #600, #800, #1000, #1200, #1500 and #2000.

    Use a small flat block when sanding to prevent your fingers from causing furrows in the finish. I used a nine volt battery. It worked perfect. Sanding first with the #400 grade, sand until all the shiny spots are gone. When done correctly, the finish should be uniform and matte. It looks like you are ruining the paint, but far from it. You will see some scratching in the clear. That is what the other grades are for. As you move up to the next grade check the finish in a good light. The finish is becoming more reflective and the sanding scratches are becoming fainter. At the #1200 level the finish is getting much smoother, lines are becoming really faint to the touch. If you find you have missed a spot, sand backwards until the grade is reached that will blend the spot and then move back to the grade level where you were in successive grades.

    Much caution must be used when sanding to avoid sand throughs. Really easy to do. The 400 grit paper requires the most work to level everything. For all other grades, let the paper do the work. Be especially cautious when sanding at the edges of the body. The finish may be thinner there and you can't use the block to sand, you'll have to do it by hand. That makes a sand through more likely.

    After the final grade of sanding is completed, the final polishing can begin.


    I will use 3M Finesse It II for this part. The entire body now is a uniform Matte finish. Smooth as a babies ass. I wish you all could see and feel this as it is so smooth and lines are completely smooth. Also, most of the clear has been removed at this point, so the body will still be very resonant.

    Here are a couple pics, the photos don't do it justice.

    top


    side

  37. #37
    Puts the ass in Class
    Veteran
    indeedido's Avatar
    Member No
    1022
    Join Date
    Feb 2004
    Last Online
    09-23-2017 @ 12:50 PM
    Location
    Where the wind comes sweeping down the plains
    Posts
    2,293
    Status
    Offline
    Thanks
    473
    Thanked 284 Times in 215 Posts


    Rep Power
    26
    Done. Done. Done. Done. Done. Finally Done.

    End results: This thing is the bomb. I wish you all could see it. Pics do not do it justice. I went with the factory look instead of the ragged out, relic look. Super glossy. Can't feel any tape lines. Fantastic feel in the neck. Easy action. I'll see if I can get some video samples up.


    I wish these pics would have loaded so you didn't have to click on them. Not sure wht happended.

  38. #38
    The Don: Roth Army Militi
    Veteran
    Don Corleone's Avatar
    Member No
    4651
    Join Date
    May 2004
    Last Online
    02-17-2024 @ 10:50 AM
    Location
    Various
    Age
    47
    Posts
    2,076
    Status
    Offline
    Thanks
    25
    Thanked 86 Times in 41 Posts


    Rep Power
    22
    Looks good.

    We need to figure a way to upload audio's so we can hear how things sound

  39. #39
    Cunning Linguist
    DIAMOND STATUS
    jhale667's Avatar
    Member No
    7379
    Join Date
    Aug 2004
    Last Online
    04-07-2016 @ 01:20 AM
    Location
    Los Angeles
    Posts
    20,929
    Status
    Offline
    Thanks
    8,152
    Thanked 4,110 Times in 2,874 Posts


    Rep Power
    82
    Nice work.

  40. #40
    Cunning Linguist
    DIAMOND STATUS
    jhale667's Avatar
    Member No
    7379
    Join Date
    Aug 2004
    Last Online
    04-07-2016 @ 01:20 AM
    Location
    Los Angeles
    Posts
    20,929
    Status
    Offline
    Thanks
    8,152
    Thanked 4,110 Times in 2,874 Posts


    Rep Power
    82
    This is kinda cool...at least the building part of it...

    http://www.youtube.com/watch?v=rRMa2Xh1SLs

    What, you can't embed vids in this forum? :confused:

Thread Information

Users Browsing this Thread

There are currently 1 users browsing this thread. (0 members and 1 guests)

Similar Threads

  1. FrankenStrat • Chip Ellis
    By VAN HLN CA in forum Main VH/DLR Discussion
    Replies: 21
    Last Post: 01-09-2008, 02:28 AM
  2. My new Frankenstrat LIVES!
    By indeedido in forum This Is Gear Street
    Replies: 36
    Last Post: 10-26-2007, 05:09 AM
  3. How I built my Frankenstrat
    By indeedido in forum This Is Gear Street
    Replies: 3
    Last Post: 06-22-2007, 05:48 PM
  4. Frankenstrat Replica on musiciansfriend.com
    By PlexiBrown in forum This Is Gear Street
    Replies: 16
    Last Post: 05-09-2007, 02:11 AM
  5. Replica Frankenstrat Website
    By MERRYKISSMASS2U in forum This Is Gear Street
    Replies: 24
    Last Post: 04-21-2007, 09:16 PM

Posting Permissions

  • You may not post new threads
  • You may not post replies
  • You may not post attachments
  • You may not edit your posts
  •